Are you ready to unleash your creativity and create a stunning floral artwork? In this article, we will guide you through the step-by-step process of painting a beautiful orchid using acrylic paints. Whether you’re a beginner or an experienced artist, this guide will provide you with the techniques and materials needed to bring this delicate flower to life on your canvas.
Before we dive into the process, let’s talk about the materials you’ll need. Here’s a list of the essential supplies:
- Acrylic paints in various colors
- Paintbrushes of different sizes
- Canvas or canvas board
- Palette for mixing colors
- Water container
- Palette knife (optional)
Once you have gathered all the necessary materials, it’s time to choose the right colors for your orchid painting. Orchids come in a variety of hues, from vibrant pinks and purples to soft whites and yellows. Take a moment to study the flower and select the colors that best capture its essence.
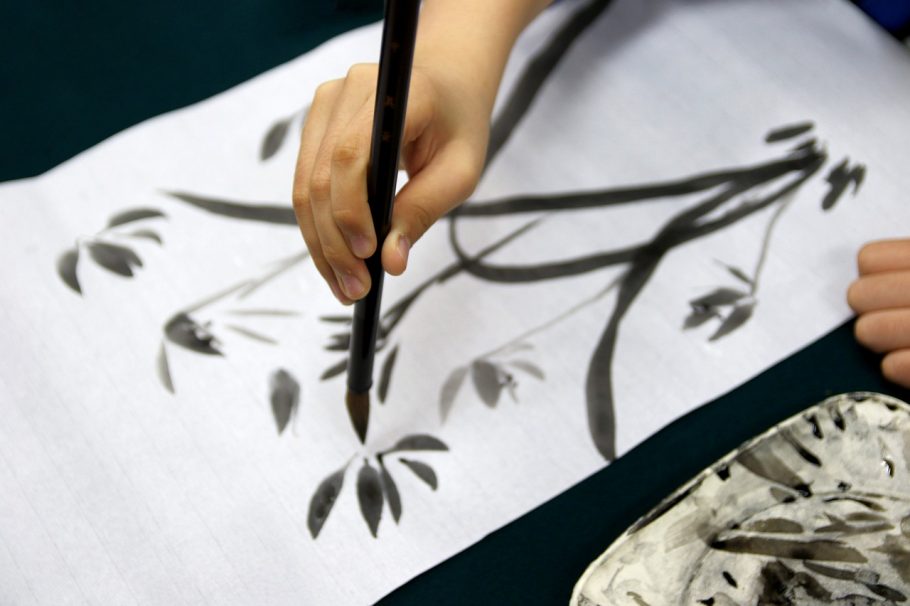
Now that you have your colors ready, it’s time to create a realistic orchid shape on your canvas. Start by sketching the outline of the flower using a light pencil. Pay attention to the delicate curves and details of the petals. Once you’re satisfied with the sketch, you can start filling in the shape with acrylic paints.
Adding depth and dimension to your orchid painting is crucial to creating a realistic and three-dimensional artwork. This can be achieved through shading and highlighting techniques. Study the orchid and observe where the light hits the petals and leaves. Use lighter shades for the areas that catch the light and darker shades for the areas in shadow.
Blending colors is another important technique to master when painting an orchid. This will allow you to create smooth transitions between different shades and tones, enhancing the realism of your artwork. Use a palette knife or a clean brush to blend the colors together, creating a seamless effect.
Now it’s time to highlight the intricate details of the orchid. Pay attention to the veins on the petals and the center of the flower. These details bring the orchid to life and add precision and accuracy to your painting. Use a fine brush and a steady hand to carefully paint these details.
The background and composition of your orchid painting play a significant role in the overall impact of the artwork. Choose a background color that complements the colors of the orchid and creates a harmonious composition. You can also experiment with different textures or patterns to add interest to the painting.
Finally, add the finishing touches to your orchid painting. Take a step back and evaluate the composition and overall look of the artwork. Make any necessary adjustments and refine the details. Once you’re satisfied with the result, it’s time to seal and protect your painting to ensure its longevity.
Displaying and showcasing your artwork is the final step in the process. You can choose to frame your orchid painting, mount it on a canvas board, or incorporate it into a larger art piece. Find a display option that best suits your style and allows your artwork to shine.
In conclusion, painting an orchid with acrylics is a rewarding and enjoyable process. By following these step-by-step techniques and using the right materials, you can create a stunning floral artwork that captures the beauty of this delicate flower. So grab your paintbrushes, unleash your creativity, and let’s paint an orchid together!
Choosing the Right Colors
Choosing the Right Colors
When it comes to painting an orchid, selecting the right colors is crucial in capturing the beauty and essence of this delicate flower. The color palette you choose will determine the overall mood and vibrancy of your artwork. To ensure a successful outcome, it’s essential to understand how to mix and blend acrylic paints to achieve the desired hues for your orchid painting.
First, let’s explore the color palette suitable for painting an orchid. Orchids come in a variety of colors, including shades of pink, purple, white, and even yellow. It’s important to observe and study real orchids or reference images to identify the specific colors present in the flower you want to paint. This will help you select the appropriate acrylic paint colors.
Once you have your chosen colors, it’s time to mix and blend them to achieve the desired hues. Acrylic paints can be easily mixed on a palette using a palette knife or a brush. Start by mixing the primary colors (red, blue, and yellow) to create the base colors for your orchid. Then, experiment with adding white or black to lighten or darken the shades accordingly.
To achieve a more realistic look, consider using a technique called color blending. This involves smoothly transitioning between different shades and tones to create a seamless and natural appearance. You can achieve this by blending the colors on your canvas using a dry brush or by layering thin washes of paint.
Remember, the key to choosing the right colors for your orchid painting is to closely observe the real flower and experiment with different combinations until you achieve the desired effect. Don’t be afraid to mix and blend colors to create unique and captivating hues that truly capture the beauty of the orchid.
Creating a Realistic Orchid Shape
When it comes to creating a realistic orchid shape in your painting, there are several techniques you can use to ensure accuracy and capture the delicate curves and details of the flower. One of the first steps is to sketch and outline the basic shape of the orchid on your canvas. This will serve as a guide for the rest of your painting process.
Start by observing the orchid closely and paying attention to its unique characteristics. Take note of the overall shape of the flower, the arrangement of its petals, and any distinctive features such as the lip or the column. Use light pencil strokes to sketch these elements on your canvas, ensuring that the proportions are accurate.
Once you have the basic outline in place, you can start adding more details to your orchid shape. Pay attention to the curves and contours of the petals, and use lighter and darker shades of paint to create depth and dimension. You can also use a fine brush to add fine lines or veins on the petals, mimicking the natural patterns found in real orchids.
Remember, capturing the realistic shape of an orchid requires patience and attention to detail. Take your time and refer to reference photos or real orchids as you work. By following these techniques, you can create a stunning and accurate representation of an orchid in your painting.
Adding Depth and Dimension
One of the key elements in creating a realistic and visually captivating orchid painting is adding depth and dimension to your artwork. By using shading and highlighting techniques, you can bring your orchid to life and make it appear three-dimensional on the canvas.
Shading is the technique of darkening certain areas of your painting to create the illusion of depth. It involves identifying the light source in your composition and determining which areas would be in shadow. By applying darker shades of your chosen colors to these areas, you can create the effect of depth and make your orchid appear more realistic.
On the other hand, highlighting is the technique of adding lighter tones to certain areas of your painting to create the illusion of light hitting the surface. This helps to enhance the three-dimensional appearance of your orchid and make it stand out. By applying lighter shades of your chosen colors to the areas that would catch the light, such as the petals or the edges of the flower, you can create highlights that add depth and dimension to your artwork.
To master the art of shading and highlighting, it is important to observe real-life orchids or reference images to understand how light interacts with the flower. Pay attention to the areas that are naturally darker or lighter and use this knowledge to guide your shading and highlighting techniques.
Blending Colors for a Smooth Transition
When it comes to painting a realistic orchid, one of the key techniques to master is color blending. Blending colors allows you to create smooth transitions between different shades and tones, adding depth and dimension to your artwork. By seamlessly merging colors together, you can achieve a more realistic and lifelike portrayal of the delicate petals and leaves of an orchid.
To begin blending colors, start by selecting the hues you want to work with. Consider the natural colors of an orchid, such as various shades of pinks, purples, and whites. Mix your acrylic paints on a palette, gradually combining different colors to achieve the desired shades. Remember to use small amounts of paint and blend them together gradually to avoid overwhelming the canvas with too much color.
Once you have your colors mixed, it’s time to start blending. You can use various techniques to achieve smooth transitions. One effective method is to use a dry brush technique, where you lightly drag a dry brush over the areas where you want to blend the colors. This technique allows the colors to subtly mix together without becoming muddy or overpowering.
Another technique is to use a wet-on-wet approach, where you apply wet paint onto a wet surface. This allows the colors to naturally blend and flow into each other, creating soft and seamless transitions. Experiment with different brush strokes and pressure to achieve the desired effect.
Remember, practice makes perfect when it comes to color blending. Don’t be afraid to experiment and try different techniques until you find the one that works best for you. With time and patience, you’ll be able to master the art of blending colors and create stunning orchid paintings with smooth transitions that enhance their realism.
Highlighting the Details
Highlighting the Details
When it comes to creating a realistic and lifelike orchid painting, adding intricate details is crucial. This is what truly brings your artwork to life with precision and accuracy. In this section, we will explore the techniques to highlight the details of an orchid, including the delicate veins on the petals and the intricate center of the flower.
To begin, you will need a fine-tipped brush that allows you to create thin lines and capture the intricate details of the orchid. Dip the brush into a slightly darker shade of the color you are using for the petals. Carefully trace the veins on the petals, following their natural curves and patterns. This will add depth and realism to your painting, making the petals look more lifelike.
Next, focus on the center of the flower. Orchid centers often have unique and intricate patterns that make them visually captivating. Use a small brush to add the necessary details, such as the tiny dots or lines that form the center of the orchid. Take your time and work patiently, ensuring that each detail is accurately represented.
Remember, the key to highlighting the details is to work with precision and attention to detail. Take breaks if needed and step back to assess your progress. By adding these intricate details, you will elevate your orchid painting to a whole new level of realism and beauty.
Background and Composition
When it comes to creating a stunning orchid painting, the background and composition play a crucial role in enhancing the overall beauty of your artwork. The background sets the stage for your orchid, providing a backdrop that complements and highlights the delicate petals and intricate details of the flower. Choosing the right background color is essential, as it can greatly impact the mood and atmosphere of your painting.
Consider the color wheel and the principles of color theory to guide your decision. For example, a complementary background color, one that is opposite to the dominant color of your orchid, can create a striking contrast and make the flower stand out. On the other hand, a harmonious background color, one that is adjacent or similar to the dominant color of your orchid, can create a sense of unity and balance in your composition.
Another important aspect to consider is the composition of your orchid painting. Composition refers to the arrangement and placement of elements within your artwork. It is essential to create a balanced and visually appealing composition that guides the viewer’s eye and creates a sense of harmony.
One technique to achieve a balanced composition is the rule of thirds. Imagine dividing your canvas into a grid of nine equal sections, with two horizontal and two vertical lines. Place the focal point of your orchid, such as the center of the flower or the main subject, along one of these lines or at the intersection points. This creates a visually pleasing composition that draws the viewer’s attention.
Additionally, consider the placement and size of other elements in your painting, such as leaves or background objects. Ensure they complement the orchid and do not overpower or distract from the main subject. Experiment with different compositions and arrangements to find the one that best showcases the beauty of your orchid.
By understanding the importance of choosing the right background and composition, and employing techniques such as color theory and the rule of thirds, you can create a harmonious and visually appealing final artwork that truly captures the essence of the orchid.
Finishing Touches and Final Steps
Finishing touches and final steps are crucial in completing your orchid painting and giving it a polished and professional finish. These steps involve adding final details, refining the composition, and ensuring that your artwork is ready to be showcased.
To add final details to your orchid painting, pay attention to the intricate features of the flower. Use a fine brush to carefully paint the veins on the petals, capturing the delicate patterns and textures. Additionally, highlight the center of the flower with a contrasting color to make it stand out and add depth to your artwork.
Refining the composition is another important step in creating a visually appealing orchid painting. Take a step back and assess the overall balance and harmony of your artwork. Make any necessary adjustments to the placement of elements, ensuring that they flow naturally and create a pleasing composition.
Once you are satisfied with the details and composition of your orchid painting, it’s time to focus on achieving a polished and professional finish. Take a close look at the painting and make any necessary touch-ups or corrections. Pay attention to the edges and corners of the canvas, ensuring that they are neat and clean.
Finally, consider applying a protective sealant to your acrylic orchid painting. This will help preserve the vibrancy of the colors and protect the artwork from dust, moisture, and other environmental factors. Follow the manufacturer’s instructions for the specific sealant you are using, and allow it to dry completely before handling or displaying your finished artwork.
By following these final steps, you can ensure that your orchid painting is complete, refined, and ready to be showcased. Take pride in your work and display it in a way that highlights its beauty and captures the attention of viewers.
Sealing and Protecting Your Painting
Sealing and protecting your acrylic orchid painting is crucial to ensure its longevity and preserve the vibrant colors for years to come. By taking the necessary steps to seal and protect your artwork, you can prevent damage from dust, moisture, and fading, allowing your painting to retain its beauty over time.
One of the most common methods for sealing acrylic paintings is to apply a varnish. Varnish acts as a protective layer, shielding the painting from external elements and providing a glossy or matte finish, depending on your preference. Before applying varnish, make sure your painting is completely dry and free from any dust or debris.
There are two main types of varnish: spray varnish and brush-on varnish. Spray varnish is convenient for covering large areas quickly and evenly, while brush-on varnish allows for more control and precision. Whichever type you choose, it’s important to apply thin, even coats, allowing each layer to dry completely before applying the next.
When applying varnish, it’s essential to follow the manufacturer’s instructions and use proper ventilation. Work in a well-ventilated area or outdoors to avoid inhaling fumes. Start by applying varnish to the back of your painting, then move to the front. Use long, smooth strokes, working from top to bottom, and ensure that the varnish is evenly distributed.
In addition to varnish, you can also consider using a UV-protective spray to safeguard your painting against harmful ultraviolet rays. This is particularly important if your painting will be displayed in a location exposed to direct sunlight. UV-protective sprays help prevent color fading and ensure the longevity of your artwork.
Once your painting is sealed and protected, it’s important to handle it with care. Avoid touching the surface directly with your fingers, as the natural oils on your skin can cause damage. Instead, use clean, lint-free gloves or handle the painting by its edges. If you need to clean your painting, use a soft, dry cloth or a brush specifically designed for cleaning delicate artworks.
By taking the time to properly seal and protect your acrylic orchid painting, you can enjoy its beauty for years to come. Whether you choose to apply varnish, use a UV-protective spray, or take other protective measures, these steps will help preserve your artwork and ensure its longevity.
Displaying and Showcasing Your Artwork
Once you have completed your stunning orchid painting, it’s time to find the perfect way to display and showcase your masterpiece. There are several options to consider, each offering a unique way to highlight the beauty of your artwork.
One popular choice is to frame your painting. A well-chosen frame can enhance the overall aesthetic and provide a finished look to your artwork. Opt for a frame that complements the colors and style of your painting, ensuring that it doesn’t overpower the delicate beauty of the orchid.
Another option is to mount your painting on a canvas board. This gives your artwork a more contemporary and modern feel, allowing it to stand out on its own. Canvas boards are easy to hang and provide a clean and polished look to your orchid painting.
If you’re feeling adventurous, you can even incorporate your orchid painting into a larger art piece. This could involve creating a collage or mixed media artwork, where your orchid painting becomes a focal point among other elements and textures. This approach allows you to explore different artistic techniques and create a truly unique and eye-catching display.
Ultimately, the choice of how to display and showcase your orchid painting is up to you. Consider the style and atmosphere of the space where it will be displayed, as well as your personal preferences. Whichever option you choose, make sure it enhances the beauty of your artwork and allows it to be admired by all who see it.
Frequently Asked Questions
- Q: What kind of materials do I need to paint an orchid with acrylics?
A: To paint an orchid with acrylics, you will need a canvas or painting surface, acrylic paints in various colors, paintbrushes of different sizes, a palette for mixing colors, water for cleaning brushes, and a palette knife for blending. You may also want to have a pencil for sketching and an easel or a flat surface to work on.
- Q: Can I use any colors for painting an orchid?
A: While you have some flexibility in choosing colors for your orchid painting, it is best to stick to the natural hues commonly found in orchids. Shades of pink, purple, white, and yellow are commonly used. Experimenting with different shades and tones can add depth and visual interest to your artwork.
- Q: How can I make my orchid painting look realistic?
A: To create a realistic orchid painting, focus on capturing the delicate curves and details of the flower. Pay attention to shading and highlighting to add depth and dimension. Use small brush strokes and blend colors for smooth transitions. Adding intricate details such as veins on the petals and the center of the flower will bring your painting to life.
- Q: What is the importance of background and composition in an orchid painting?
A: The background and composition play a crucial role in enhancing the overall impact of your orchid painting. Choose a background color that complements the colors of the orchid and creates a visually appealing contrast. Consider the placement and arrangement of the orchid within the composition to create balance and harmony.
- Q: How do I protect and preserve my acrylic orchid painting?
A: To protect your acrylic orchid painting, apply a varnish or sealant once the paint has fully dried. This will help preserve the colors and prevent them from fading over time. Ensure that the painting is kept away from direct sunlight and extreme temperature or humidity changes. Proper framing or storing the painting in a protective sleeve can also help maintain its longevity.
- Q: How can I display my finished orchid painting?
A: There are various ways to display your finished orchid painting. You can frame it using a suitable frame that complements the artwork. Another option is to mount it on a canvas board for a contemporary look. If you prefer a more creative approach, you can incorporate it into a larger art piece or even use it as a centerpiece in a gallery-style display.